Why hello there!! It's time for another Stamp to Share Blog Hop. We are a group of Stampin' Up! demonstrators from each Stampin' Up! market around the world, sharing what we love, Stampin' Up! of course.

This hop we are showing the super fun Coffee Cafe Bundle from the Coffee Break Suite in the 2017 - 2018 Annual Catalogue. Love it!
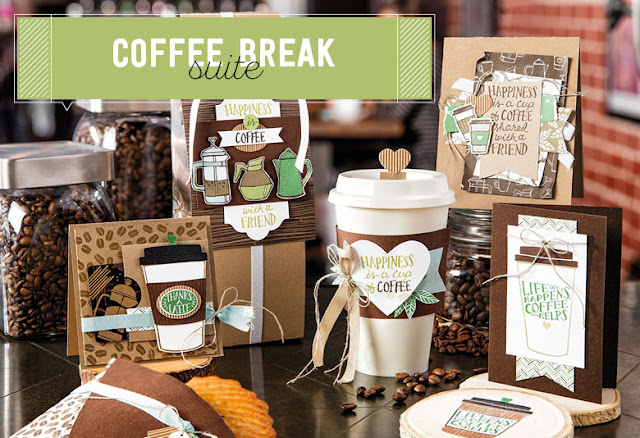
I've made two cards today using the sentiment from the Coffee Cafe stamp set and then embellished the cards using the Coffee Cups Framelits Dies and the Coffee Break DSP.

My first card I've die cut a few of the really small coffee cups from the Framelit set and adhered them to the Crumb Cake layer. This technique is called Faux Embossing and it makes it look like the cardstock has been run through and embossing folder with the Big Shot. Super easy to do and so effective.
Underneath the faux embossed layer is a piece of the Coffee Break DSP. How cute are those little hearts? I don't realise this gorgeous pattern was in the DSP until I opened it. Just love it. Will be making more creations with that pattern, that's for sure!

Over top of the faux embossing look I flicked the Early Espresso Stampin' Write Marker for a fun splatter look. Just use the brush tip end and the lid of the marker to flick the splatters.
I've then finished the card off with some Garden Green Stitched Satin Ribbon, Linen Thread, Gold Sequins and the cute little coffee cup die cut from a sheet of the Coffee Break DSP. Did you know that the little coffee cup from the Coffee Cafe Framelits Dies die cuts the little coffee cups from the Coffee Break DSP? Love that. Makes the products so much more versatile and No fussy cutting! Boo yeah!!

The second card I wanted to use that big sentiment as a focus point on the card and then do a bit of a a watercolour wash over it. I first stamped the sentiment in Versamark Ink and then embossed it with Gold Stampin' Emboss powder. Once the embossing was set then I washed over it with Soft Sky Ink for an emboss resist look.
Once the water colour wash was dry I then used the aqua painter to flick drops of water over the ink and then once the water droplets we dry I used the Soft Sky Stampin' Write Marker for some ink splatters. Lots of processes but I think the layers of ink and water give a fabulous look. Because the Soft Sky ink is really light it is quite hard to photograph but it looks fabulous in real life.

Then in the top left corner I've embellished it with Soft Sky Classic Weave Ribbon, Gold Mini Sequin Trim, Linen Thread and the heart from the Corrugated Elements embellishments. As I was adhering the heart to the ribbon I pushed down quite hard to make sure that it was stuck down and pushed in some of the corrugations. Oops.

Over the corrugated heart and the little coffee cup I brushed over Clear Wink of Stella for some more gorgeousness but its so hard to photograph. If anyone has any great tips on photographing Clear Wink of Stella, I'd love to hear them. It's just too pretty not to show you.

Now on to the amazing Sandi MacIver over in Canada. She is going to knock your socks off with her creations! Just amazing!!!!

If you do get lost along the hop, here is a list of the Design Team members - Just click on their name to get you going again.
Rochelle Blok - Australia - You are here
Moira Mcilroy - France
Thanks so much for stopping by!

Live in Australia?
Shop for Stampin' Up! with me 24/7
Recreate these cards at home using
the following Stamin' Up! products. Click on the images below to see the
product information and to shop from my online store.


Just gorgeous, love your different take on this bundle <3
ReplyDeleteThanks Monica! xo
DeleteAwesome projects Rochelle! Love the die cut cups on the background and your touch of gold on the other card is perfect! :)
ReplyDeleteThank you Amy! xo
DeleteYour vision for you cards always blows me away! I love them both but the embossed look of the first card is really cool. I must remember this technique myself!
ReplyDeleteThanks Paula! xo
DeleteBoth projects are so gorgeous Rochelle! The embossing technique for your first card are awesome and i love the aquarell look on your second card :) ! Thanks for your ideas, Nadine
ReplyDeleteThanks Nadine! xo
DeleteLove the die cut cups, never thought to do something like that. Your cards are gorgeous TFS!
ReplyDeleteThank you Donna! xo
DeleteGorgeous cards Rochelle - I especially love your Watercoloured background x
ReplyDeleteoh wow Rochelle, that faux embossing technique is very cool, I have to try that one for sure and love both your cards, beautiful, and different. You always give us such great creative ideas with your projects.
ReplyDelete