Friday, December 15, 2017

Fancy Friday Blog Hop | Mixed Metallics


Hello and happy Friday!! Or as I say to my kids sometimes Happy 'Fri-yay'! Such an exciting post for me today and I've been itching to share that I've been asked to join the most amazing and talented group of stampers that make up the Fancy Friday Design Team. This group is made up past and present Stampin' Up! Artisan Design Team Members and I'm so grateful and honoured to have been asked to join in this fabulous group. I had been secretly wishing I would be asked to join Fancy Friday and am so very thankful that I have been.

This weeks theme is Mixed Metallics and inspired by the Year of Cheer Suite in the current 2017 Stampin' Up! Holiday Catalogue. Gorgeous intricate designs with elegant foil and is perfect for those beautiful metallic projects.

I've made 4 cards today using the Year of Cheer Specialty Designer Series Paper and teamed it up with lots of metallic products from both the Annual and Holiday Catalogues.


I've actually cased myself from a card that I made a few weeks ago. I really loved the making the longer card back then and thing it works perfectly for today's card too. I'm not usually one to make New Year's cards but the DSP really lends itself to celebrating this fabulous time of the year with all it's shine and shimmer.

My cards are using parts of the fun Eclipse Technique but instead of popping up the die cut pieces of DSP (I thought that just looked to crazy busy) I replaced the DSP with the Silver Glimmer Paper. So sparkly and gorgeous and goes great with that New Years theme.


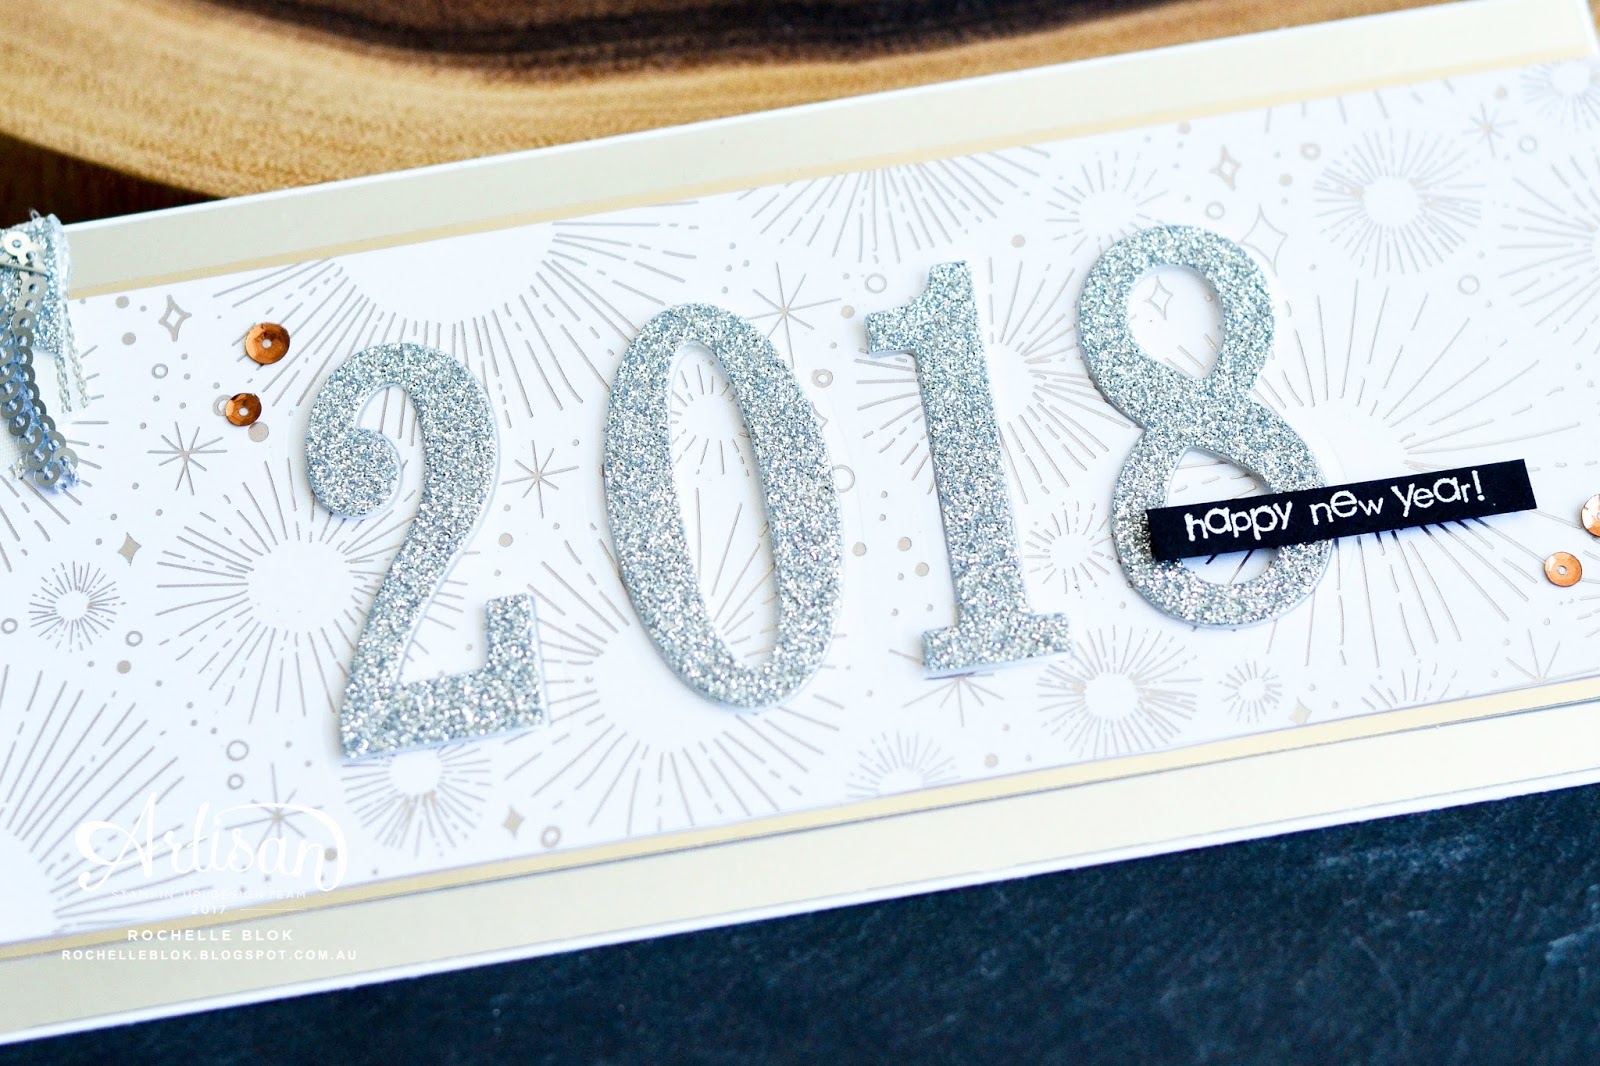
As you can see the DSP comes in 4 different single sided metallic foil patterns so I had to make a card showing each one. Super pretty! And then on the top and bottom of each card I've layered some Champagne and Silver Foil Paper for more of that gorgeous metallic look.

The 'Happy New Year!' comes from the Teeny Tiny Sentiments Stamp set and then I've finished each card off with Metallic Sequins and Silver Glimmer Paper and some Silver Ribbon and Trim from the Annual Catalogue.  I really thought that because there was enough going on in the patterns of the DSP the cards really didn't need much embellishing but if you wanted to embellish the card with more metallics there is a lot to choose from in Stampin' Up!'s offerings.

Thanks for joining me on my first Fancy Friday Post and I'm hoping to share lots more creations with you all. Now on to Dani for her metallics creation.


Thanks so much for stopping by!
Live in Australia?
 Shop for Stampin' Up! with me 24/7


 Recreate this card at home using the following Stampin' Up! products. Click on the images below to see the product information and to shop from my online store.


Stampin' Up! Artisan Blog Hop | Merry Cafe

Hello Stamping Friends! Welcome to our very last 2017 Stampin' Up! Artisan Design Team Blog Hop for December and for the year. I can't believe we are at our last post already! It feels just like yesterday when this amazing journey began. While this year has been at times a little crazy I have truly loved every minute of it and still cant believe that I was give this opportunity of a life time. I am so very grateful for everything that this team has brought. Also a big thank you to all of you who have supported me along the way!

I'm a bit sad that this Artisan year has come to an end I'm super happy for those that have been selected for 2018. These creative and talented ladies are amazing and I'm sure they will inspire you as much as what they do me. Check out the list at the end of this for the 2018 team and go and show them your support.

Now on to my card for today, we are using the Merry Cafe Stamp Set and I'm going out with one of my final (I think it is) Christmas Cards for the year. Its such a cute and fun set and covers everything from Halloween to Christmas and everything in between.

I've created a fun Christmas Coffee Cup making it look like the fun decorated ones from the popular coffee stores sticking with the traditional Red and Green colours for that Christmassy look.


I've gone for that tone on tone look with the coffee cups stamping Real Red on the Real Red cardstock and then Garden Green on the Garden Green cardstock. I've then sponged around the edges in each co-ordinating colour for some added dimension. 


The great thing about this stamp set is that it has matching Framelits from the Annual Catalogue, the Coffee Cups Framelits Dies. Loving the textured coffee cup collar for that added layer and element. On the collar I've added more of that Christmas by die cutting a Gold Glimmer snowflake from the Seasonal Layers Thinlits Dies.


I know for sure that I would love a gorgeous coffee cup like this when I get my coffee. So cute! The coffee cups have been layered on a piece of Christmas Around the World Designer Series Paper that is layered on the Wood Textures Designer Series Paper. Its all finished off with some Linen Thread, Cherry Cobbler 1/4" Double-Stitched Ribbon and some sequins from the Mini Sequin Trim.

Now for the last time this year on to the amazing Shannon Lane in Canada for her fabulous Merry Cafe creation!

https://crushoncolour.blogspot.com.au/2017/12/artisan-dec-1.html


 And now here is the complete list of 2018 Artisans. Make sure you visit their blogs and subscribe! You won’t want to miss their amazing creations! A whole lot of talent right there that's for sure!

ARTISAN DESIGN TEAM 2018

United States

Canada

United Kingdom

France

Netherlands

Germany

Austria

New Zealand

Australia
Thanks so much for stopping by!
 Live in Australia?
 Shop for Stampin' Up! with me 24/7
 Recreate this card at home using the following Stampin' Up! products. Click on the images below to see the product information and to shop from my online store.
 

Just Add Ink #390 | Just Add a Sketch

Hello there stamping friends! It's Friday so that means its time for a new Just Add Ink Challenge. A gorgeous and fun sketch designed by the gorgeous and fun JAI team member, Narelle.
https://just-add-ink.blogspot.com/2017/12/just-add-ink-390sketch.html

My card today is using lots of new and oh so gorgeous products from the 2018 Stampin' Up! Occasions Catalogue, which goes live January 3rd 2018. All the new products I've used here today come from the Sweet Soiree Suite. Lots of gorgeous hand painted florals and classic silver metallics for an elegant combination. This suite is just everything gorgeous and pretty and I can't love it enough!


I've started with a Whisper White, fresh base and then added some die cut flowers from the new Sweet Cake Framelit Dies and a piece of the beautiful Marina Mist Scalloped Velvet Ribbon from the Sweet Soiree Embellishment Kit. Swoon!! 


The next layer is the Powder Pink rectangle and this has been embossed with the Shimmery White Embossing Paste with the Sweet Soiree Decorative Masks. The Shimmery White Embossing Paste has a beautiful glitter fleck through it and gives that added shimmer and sparkle for that pretty shine! More swoon!!! 


The front panel has been embellished with some more flowers from the Sweet Cake Framelits Dies. The Old Olive leaves also come from this Framelits Dies set. On top of that is a printed die cut from the Sweet Soiree Embellishment Kit which has been embossed with a silver foil as well as some vellum pieces also embossed with the silver foil, again from the same embellishment kit.

Did you see that Berry Burst Metallic Edge ribbon? Another pretty from this amazing suite!!! You wont be disappointed when you see all these products in real life. They are just that gorgeous!

I know its a really busy time of the year for everyone but if you have a few spare hours why not create a card for this weeks challenge and come and join in the fun. It might help you unwind a little if things are getting too crazy!

If you are after some fabulous inspiration for this challenge make sure you check out the rest of the wonderful creations from the rest of the Just Add Ink team. While you are there check out all the details on how to enter your creation and then get crafting! Can't wait to see what you create!

Thanks so much for stopping buy!
 Live in Australia?

 Shop for Stampin' Up! with me 24/7
Recreate this card at home using the following Stampin' Up! products. Click on the images below to see the product information and to shop from my online store.
  
Coming Soon - January 3rd 2018

Available Now

Thursday, December 14, 2017

Stamp to Share International Design Team Blog Hop | Gift Packaging

Hello stamping friends. Welcome to this months Stamp to Share International Design Team Blog Hop. In amongst this Christmas Season we've got some Gift Packaging ideas for you.

I've got some boxes for you today that are quick and easy to 'whip' up if you still need a quick box for a last minute gift. Its really not long now till Christmas day and if you still need a gift box idea these will help you out of a bind, that's for sure. The longest part of making these boxes will be in the decorating of them and you can make them as minimal or extravagant as you want!

I've gone with one more run of the Merry Little Christmas Designer Series Paper. I've so loved this DSP and I've nearly used up all my stash of it. 😢 Everything about it is amazing! Love, Love Love!!


I made the boxes with the Envelope Punch Board. Just Google Envelope Punch Board Boxes and I'm sure you will be able to find a tutorial on how to make these. They are just too easy!


This first box I've added some Linen Thread, Basic Black Baker's Twine and Silver Metallic Thread and then added a Chalkboard look tag using the Merry Little Labels Stamp set. Super cute and super fun!

To make the Chalkboard look just stamp your image in Whisper White Craft ink, pour over White Stampin' Emboss Powder and heat emboss it. Once the embossing has cooled down and set , wipe over the card stock either with a sponge or a sponge dauber with Whisper White Craft Ink to make it look like 'chalk dust'. Keep going till you have the look you are after.


The next box I've embellished it with the Old Olive 1/4" Stitched-Edge Ribbon and again a tag from the Merry Little Labels Stamp set. Emboss your label on Vellum and layer it on Glimmer Paper for that added sparkle and shine. How gorgeous are those Green Sprigs? A fabulous embellishment for that on trend look.


The last box uses the amazing Buffalo Check pattern. This and the Black and White Version have been my most favourite of all the patterns in this DSP pack. The pattern just pops and is so eye catching! I've embellished this box with some Silver Mini Sequin Trim and some Silver Glimmer Paper die cut with the Large Letter Framelits. Die cutting the first initial of the recipients name is a fabulous alternative to using gift tags.


I do hope that I've given you some more Gift Packaging inspiration and something that will help you to get some gorgeous gift boxes this Christmas.

Now on to my gorgeous friend in New Zealand, Paula Dobson. She has something fabulous to inspire you!

https://stampinantics.blogspot.com/2017/12/gift-packaging-stamp-to-share.html


Thanks so much for stopping by!
 Live in Australia?

 Shop for Stampin' Up! with me 24/7
 Recreate these boxes at home using the following Stampin' Up! products. Click on the images below to see the product information and to shop from my online store.

Wednesday, December 13, 2017

December Birthdays Blog Hop

Hello stamping friends! Welcome to a special 'December Birthdays' blog hop! We are Stampin' Up! demonstrators from all over the globe showing some special birthday cards in amongst this Christmas season.


Sometimes those that celebrate their birthday in December sometimes get a raw deal, lost in amongst everything else going on or even combined with a Christmas celebration. No fair for you December babies. So we are here today to celebrate you!

My card today is for my second son who celebrates his 12th birthday tomorrow. Happy Birthday Seth! I've always made it for his birthday that his birthday presents are never combined with his Christmas presents and that the two events are kept very separate from each other.

I've got a little sneaky peek in my card today for you from the upcoming 2018 Stampin' Up! Occasions catalogue, which starts January 3rd 2018.

The stamp set I'm using is called Picture Perfect Birthday. It's such a fun set with the two-step stamping technique of most of the images. Perfect for any age!


I've kept my card fairly pulled back today as boys generally don't like all that 'fluff 'n' stuff' , well my boys aren't really fans. I couldn't help. though, adding a little ribbon and some mini sequin trim. Just a little bit. Got to have a little bit of shimmer!


I've gone with a Primary Colour combo. It's bright and fun and great for boys. Can be used with anyone really! The colours used for each bow to create that two-tone look are Daffodil Delight, Crushed Curry, Tempting Turquoise, Dapper Denim, Real Red and Flirty Flamingo. Just play around with the Stampin' Up! colours till you are happy with the two-step stamping look.


The base of the card I've just repeatedly stamped the little 'sprinkle' image to create some more added interest and more fun for my card. Lets hope Seth likes it! Make sure that you put this set on your wish list so that by the time Jan 3rd comes around you are ready to order this fun set!

Now on to the fabulous Stesha Bloodhart with her gorgeous birthday creation!

https://stampinhoot.com/2017/12/december-birthdays-blog-hop/
Stesha Bloodhart

If you get lost along the way here is the list of participants for you to get right back on track
 

Thanks for stopping by!
 Live in Australia?

 Shop for Stampin' Up! with me 24/7
 Recreate this card at home using the following Stampin' Up! products. Click on the images below to see the product information and to shop from my online store.

Coming Soon - January 3rd 2018 - Picture Perfect Birthday - 18 Photopolymer Stamps - 145519 - $30.00 AUD


Friday, December 8, 2017

Just Add Ink #389 | Just Add Inspiration

Hello stamping friends!! Welcome to you all and welcome to a new challenge over at Just Add Ink. We have a beautiful, rustic inspiration picture for you!

https://just-add-ink.blogspot.com/2017/12/just-add-ink-389inspiration.html

It's got lots of neutrals, some gorgeous foliage and a fun and festive feel. Lots of things that l love! Although when it comes to paper crafting there isn't much that I don't love!

I've used the neutral colours, twine and the pretty foliage as the inspiration for my 'Christmas Present' card. Loving the neutral tones and then the mix of the black and white and the green and red tones. So pretty and so Christmassy, if that is even a word. It is now! Ha!


The base of the card is layers of Crumb Cake cardstock and the Merry Music Specialty DSP. The very top layer of Crumb Cake I embossed with the Softly Falling Textured Impressions Embossing folder. The edges of this embossed layer I sponged with Whisper White Craft Ink to create that frosted look.


I then added twine, metallic thread, ribbon, and die cut pine branches to make the card front look like a wrapped Christmas Gift like the gifts in the inspiration picture.


All finished off with a small embossed tag using the 'Merry Christmas' for Teeny Tiny Sentiments and some Gold Sequins from the Metallic Assortment Sequins, dotted on the card front.

I hope that I've given you some inspiration for this weeks inspiration picture. Please check out the rest of the fabulous Just Add Ink Design Team Gals and their take on this weeks inspiration picture. While you are there checking out the rest of the amazing inspiration, check out all the details on how you can enter you creation to this weeks challenge. Can't wait to see your take on this fabulous inspiration picture!

Thanks so much for stopping by!
 Live in Australia?

 Shop for Stampin' Up! with me 24/7
 Recreate this card at home using the following Stampin' Up! products. Click on the images below to see the product information and to shop from my online store.

Friday, December 1, 2017

Stampin' Up! Artisan Blog Hop | Colour Me Happy

Oh, Hello and welcome stamping friends to another Stampin' Up! Artisan Design Team Blog Hop.  We sure do have lots of crafty goodness for you. You may have joined me here from my beautiful friend in New Zealand, Paula Dobson or you have started here with me. Either way you are being treated to lots of creative inspiration!

I've had a play and create with the Colour Me Happy Stamp Set, the Stampin' Blends and some of the pieces and embellishments from the Colour Me Happy Kit. I was in a Pink and Flowers kind of mood today and really enjoyed putting this card together despite it being crazy, crazy hot here in Melbourne today. I think I nearly melted on to my chair at my crafting desk today it was that hot!

The Colour Me Happy Stamp Set has be designed with lots of open line work images, perfect to use with the Stampin' Blends Alcohol Markers.


I used the Pink Pirouette Dark and Light Stampin' Blends Alcohol Markers to colour the flower images from the Color Me Happy Kit and then teamed those flowers up with the leaves from the Rose Wonder Stamp Set, coloured with the Old Olive Dark and Light Stampin' Blends Markers.


I arranged the flowers and leaves on a die cut Stitched Shapes Circle and then layered that with the Gold starburst, Pool Party Tassel, Whisper White Bakers Twine and the  gorgeous Sequins all from the Colour Me Happy Project Kit. How cute is that tassel?? Such a gorgeous colour and super cute too!


To add some extra interest I flicked the Pink Pirouette Stampin' Write Maker over the front of the card base. The 'Oh, Hello' sentiment has been layered with the Pool Party Glitter Ribbon, the Decorative Ribbon Border Punch and a Strip of the Whole Lot of Lovely DSP. Lots of layers, lots of texture and lots of embellishments. All the things I love!

I do hope I've inspired you to use the Colour Me Happy Stamp Set and Project Kit in another way. If you feel game enough challenge yourself to use these fabulous products in another way! It makes everything so much more versatile.

Now on to the super amazing and super creative, Shannon Lane in Canada!! Shannon has such an amazing style! I just love her creations!!

https://crushoncolour.blogspot.com.au/2017/11/artisan-nov-3.html


Thanks so much for stopping by!
 Live in Australia?
 Shop for Stampin' Up! with me 24/7
 Recreate this card at home using the following Stampin' Up! products. Click on the images below to see the product information and to shop from my online store.

Just Add Ink #388 | Just Add Glitter

Hello stamping friends!! Welcome to another Friday and to another Just Add Ink Challenge - Just Add Glitter.


This should be an easy challenge because most of us love to add some glitter to any creation that we are making! I know I do! It can be as little or as much glitter as your heat desires!

I've gone for a classic colour combo, Black and Gold, for a clean Christmas card with a touch of glitter in the form of Gold Glimmer Paper.


How gorgeous is that Gold Buffalo Check DSP from the Year of Cheer Speciality DSP?!!! It really is stunning on it's own and really doesn't need much else to accompany it.  But if you want to add to it some Black and Gold accents really set it off!


I embossed the 'Peace on Earth' from the Carols of Christmas Stamp set using Gold Stampin' Emboss Powder on Vellum Cardstock. This then I die cut out with the Layering Squares Framelits and layered it on to a piece of Shimmery White cardstock.

 Under the 'Peace on Earth' I accented it with a strip of the Merry Little Christmas DSP and a piece of the Merry Music DSP.  Those two DSP's work fabulously together and they are a perfect accent for the Gold check DSP.


Finally I cut the snowflakes out using the Seasonal Layers Thinlits on Gold Glimmer Paper. Love the shimmer and sparkle of the Gold Glimmer Paper. Those snowflakes are a fabulous addition to the Gold Check DSP and the Gold Glimmer Paper is the perfect touch of glitter.

If you are after some more glittery inspiration for this challenge check out all the fabulous creations from the rest of the JAI gals and I'm sure you will get the creative ideas flowing.

Thanks so much for stopping by!
Live in Australia?
 Shop for Stampin' Up! with me 24/7
 Recreate this card at home using the following Stampin' Up! products. Click on the images below to see the product information and to shop from my online store.

Friday, November 24, 2017

#TGIFC135 | Ombre Technique

Hello friends and a big welcome to you! Today for new new challenge over at TGIF Challenges we have a technique for you, Ombré.

I'm sure you've all seen cards with the Ombré look and I for one am a big fan. But if you aren't sure what Ombré is here is a definition for you googled from the Internet.

ombre

  om·bre
The definition of ombre is the French word for color that is shaded or graduated in tone.
An example of ombre is the color of a dress that is light gray at the top, medium gray in the middle and dark gray at the bottom.

I've gone for an Ombré Christmas card and mixed it up with the Eclipse Technique. Super easy and so fun!


I first started this card with trying to sponge 3 different colour greens on a piece of Shimmery White cardstock to get the varying shades of colour from light to dark. But as I was trying to get the colour sponged across the cardstock it just wasn't working or looking very good. So that idea was scrapped. I then thought to, again using the Sponge Brayer, sponge just one colour of green - Garden Green, over the Merry Music Specialty Designer Series Paper. Because this DSP is white with the black print, it is perfect to add colour too so it co-ordinates with whatever project you are creating.

I just started with the colour at the bottom of the DSP and then rolled the Sponge Brayer, back and forth and then also moving it up the DSP, keeping the darkest concentration of colour at the bottom, thus creating the Ombré look.
 

 The next part of the card was to die cut the 'Joy' letters for the Eclipse part of the card. Once the letters were cut out of the DSP I then cut 3 more of each letter out of Basic Black cardstock and layered them all together. This layering of all those Basic Black cardstock adds to the effect of the technique, creating more of a shadow.


I popped the letters up as well with some Mini Stampin' Dimensionals and then added some ribbon and trim while layering the 'Merry Christmas' from the Teeny Tiny Sentiments. Last but not least I punched out some pieces from the Holly Berry Builder punch to add to that Christmas feel.

. If you are after some inspiration for this challenge check out all the fabulous creations from the rest of the TGIF gals and I'm sure you will get the creative ideas flowing. I do hope that you will join us this week for this fabulous Ombré technique.

Just on a side note, this is my last challenge with the TGIF crew. I'm stepping down from the design team to have a break after this most momentous and most fabulous year.  I'm so very thankful to have been part of the TGIF DT and I hope that my creations have inspired you one way or another. I'll still be blogging and creating but just having a little bit of time to recharge. Thank you to all you who support me. Love to you all!

Thanks so much for stopping by!
Live in Australia?
 Shop for Stampin' Up! with me 24/7

 Recreate this card at home using the following Stampin' Up! products. Click on the images below to see the product information and to shop from my online store.