Showing posts with label 3-D. Show all posts

Friday, June 20, 2025

Come Artisan With Us Instagram Hop | 2025 Artisan Design Team


We love being your 2025 Stampin’ Up! Artisan Design Team! Hop along with us today to see our projects that were inspired by something we love about being an Artisan! And if you are a Stampin’ Up demo, you can apply now through June 30th to be on the 2026 team!

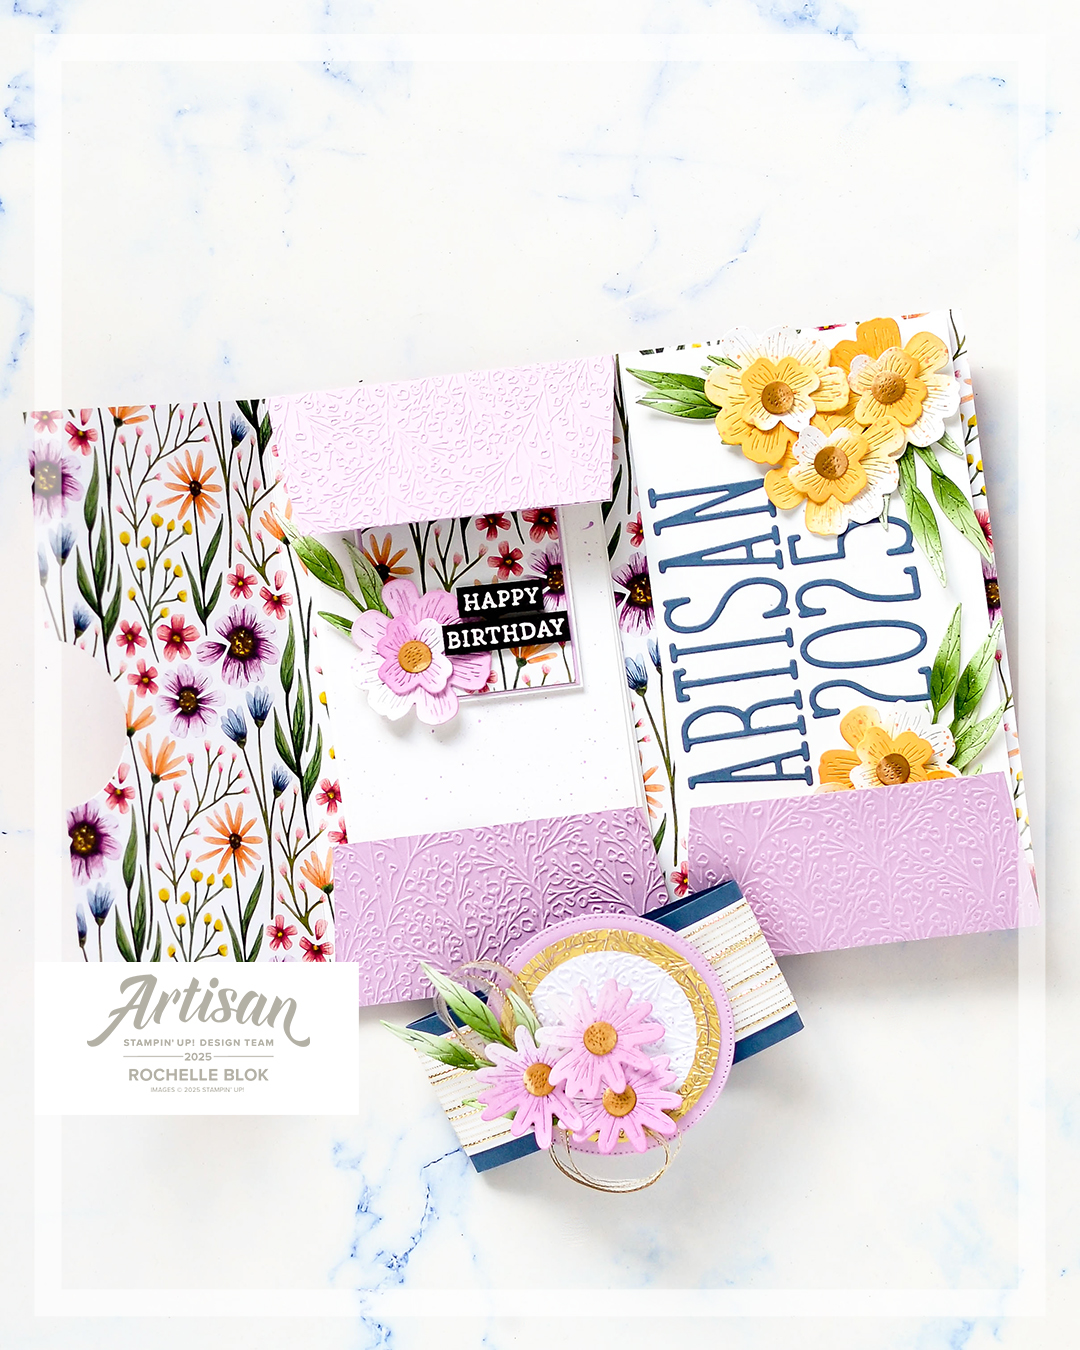
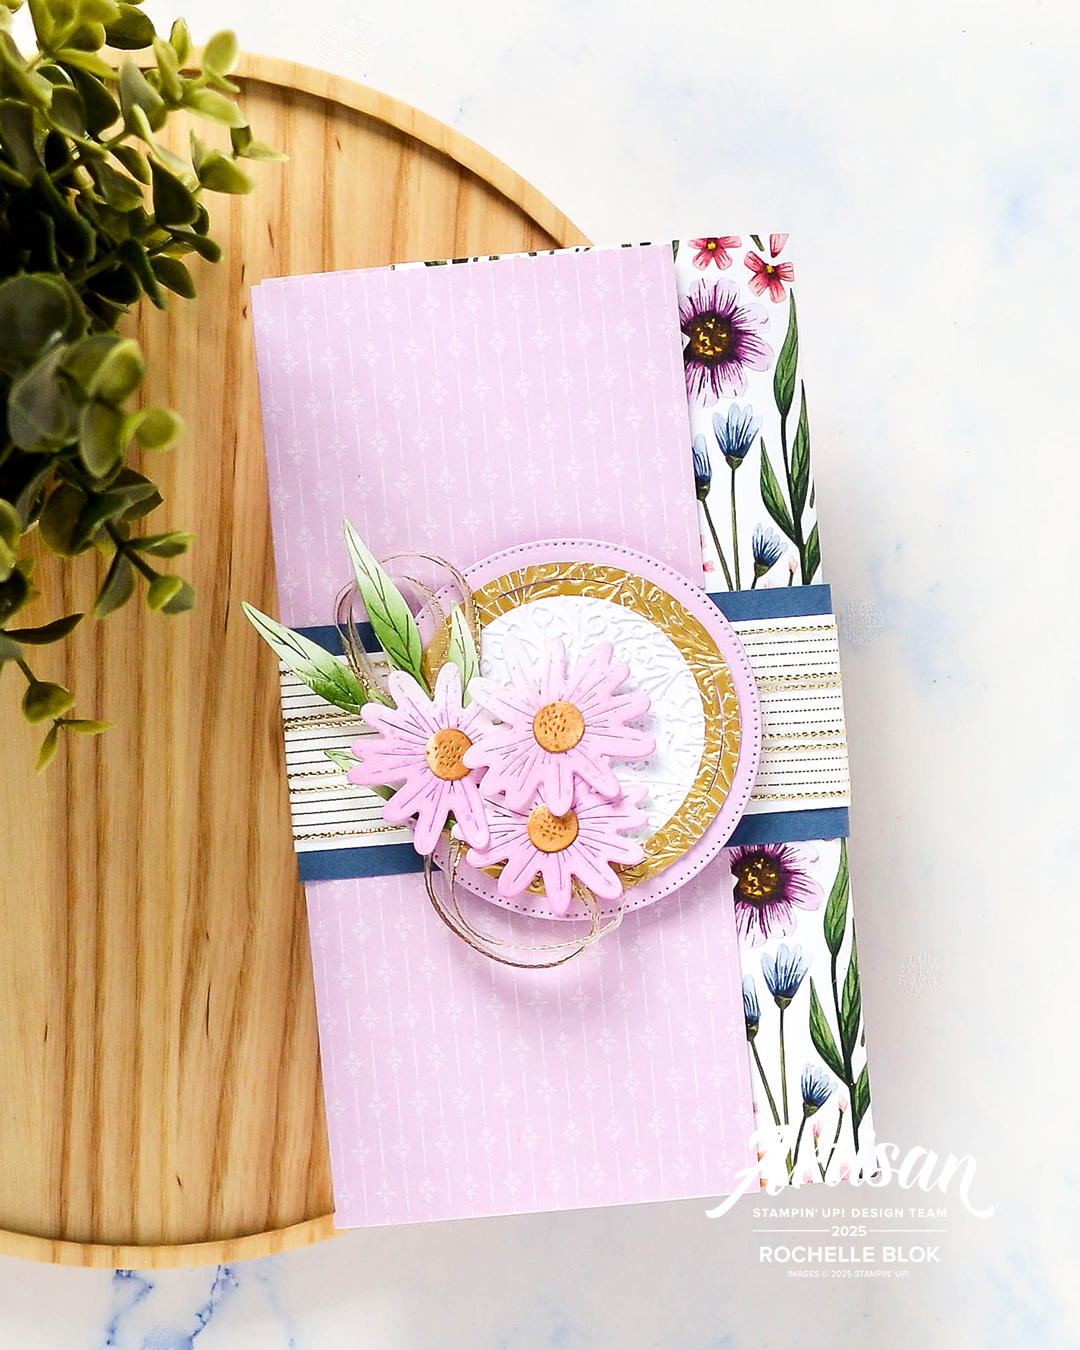
Here I've made a birthday folder/folio using products from the @stampinupofficial Floral Impressions Suite, which was one of the suites that was in one of my Artisan Design Team product boxes.  I wanted to have the birthday list of the 2025 Artisan Design Team decorated and made pretty in some sort of folder, and then somewhere to also have some cards ready to write and send for the next lot of birthdays. And that is what I've done here today!  It's fun to celebrate each Artisan Design Team Member throughout the year!⁠
⁠


Being an Artisan is so much more than crafting (and free products 😉). It's support, inspiration, connection, creativity, a sense of community, celebrating each other, fun and most of all, lifelong friends! And once an Artisan, always an Artisan! If you're a Stampin' Up! demonstrator and have been thinking about applying, go for it! What do you have to lose? It's an amazing opportunity, an opportunity of a lifetime! 

Time to keep hopping! Next up on our hop is Carina @inastempelt . You are sure to love her project, so make sure to show them some love!⁠
Full list of today’s hoppers:⁠
⁠
Pamela @passionateaboutscrapbooking⁠
Stacey @stampinwithstaceymarsh⁠
Bree @craftsomnia⁠
Andrea @andreaksargent⁠
Sarine @sarinezijderveld⁠
Jaqueline @touchofjoycs⁠
Maheswari @maheswarirajaguru⁠
Rochelle @thestampingblok_rochelleblok - You are here⁠
Carina @inastempelt⁠
Lara @scrappykea⁠
Constanze @conibaer⁠
Kim @kim_mcgillis⁠
Ashley @designwithink⁠
Marion @einilomascrap⁠
Cornelia @manufaktur_herzgemacht⁠
Petra @stempelstein⁠
Eve @scrapbook_fait_avec_amour⁠
Christine @christinecabello_latortuescrap⁠
Jay @mitosucrafts⁠
Yvonne @thecreativeteacup⁠

Go to my Instagram feed HERE and then you can click through the links to see everyone's creations. Be sure to give us some Instagram ❤️ and a comment or two.

Thanks so much for stopping by!
Happy Stamping! 

Live in Australia?
Shop for Stampin' Up! with Me 24/7 HERE
 
 Recreate this project at home using the following Stampin' Up! products.  Click on the images below to see the product information and to shop from my online store
 

Sunday, November 10, 2024

CASE-ing the Catty | #ctc495 | Case a die project from either catalogue

 Hello Stamping Friends. Welcome to a super exciting CASE-ing the Catty Blog Hop. We at CASE-ing the Catty are about CASE-ing the samples from the Stampin' Up! Catalogues (Catty) with a different theme to CASE each week. To CASE is to Copy and Selectively Edit.

If you've come from Monique Fielder's blog welcome, if you have started here with me also welcome.

This week we are CASE-ing a project using dies from either the Stampin' Up! Annual Catalogue or the Stampin' Up! 2024 Sept-Dec Mini Catalogue. I realised after I made my box that the sample I CASE-d my project on isn't actually in either catalogue because the products used in the sample are Online Exclusives. Oops! I figured I was still CASE-ing a Stampin' Up! sample so I thought I would just go with it.


I love the layering of the original sample along with the addition of the twine and embellishments.


From the original sample it looks like it is a box, so I made a box as well. I've made a simple 'pizza' style box but rectangular instead of square. It's the perfect size to hold a few chocolates or a small gift.

The DSP used comes from the A Little Bit Festive Mix & Match Specialty DSP. I love the Night of Navy Gingham and not only is it perfect for your Christmas crafts but it's a DSP design that can be used all year round. So versatile! Under the DSP layers I've used one of the Christmas Label Dies, cut in half, made to look like it was one long die. I hadn't planned for the negative pieces of the die cut to stay in but when I pulled the die cut out of the die and they all stayed in I thought it looked awesome that way so in they stayed. This is a fantastic way to give different look to your die cuts.

I've embellished my box using the Joyful Images and Joyful Sayings Mix & match Ephemera. I've layered the ephemera and sentiment like the design on the original box. I've changed the orientation of the twine only because I liked it better horizontal instead of vertical. Personal preference.

I've finished the box off with a placement of a few of the Opal Rounds. They coordinate so perfectly.

I love that when using the Mix & Match Ephemera how quick your creation comes together, and the ephemera makes for some budget friendly crafting. 

Next up on the hop is the lovely Peta Stephen. Be sure to give her some CASE-ing the Catty Blog Hop love.


Rochelle Blok - You are here

We would love to have you join us over at our Facebook group to share your creation CASE-ing a project from the 2024 - 2025 Stampin' Up! Annual Catalogue and join in this week's challenge. You don't need to have a blog to join in!


Thanks so much for stopping by!
Happy Stamping!
Live in Australia?
Shop for Stampin' Up! with Me 24/7 HERE

Recreate this project at home using the following Stampin' Up! products.  Click on the images below to see the product information and to shop from my online store. 

Tuesday, October 22, 2024

Stampin' Fancy Friday | Not a Card Challenge

 Hello stamping friends! It's a new month and its time for us to get our fancy on with the new Stampin' Fancy Friday Challenge. This month we are all about not creating a card but creating things 3D, home decor, scrapbooking, etc. Anything that isn't a card.


I've made for you today some Two-Tiered Gift Boxes. Thank you to Claire from @createdtheotterway for your fantastic You Tube Tutorial.  Making these boxes has reminded me at how much I love making 3D/boxes which I haven't done much of this year. 

I love creating gift boxes for fun and personalised gifts. They are also a fantastic way to dress up chocolates or sweets when giving them as gifts. Just makes them a little bit nicer than giving them in their original packaging.

I've used the super cute products from the Reindeer Days suite for some gorgeous Christmas gift boxes.

I've created the boxes in three different colour/DSP combinations just to show a different look with the different colours. All the DSP used comes from the Reindeer Days DSP pack. I've used only three of the sheets from the pack but any one of the designs would work well. How amazing is that DSP though??!! The Stampin' Up! designers outdid themselves on this one, that's for sure!

Upon removing the lid, the box has two trays on the inside to either put chocolates or sweets or a small gift. Or chocolates/sweets and a small gift. Each tray can hold 4 of the chocolate balls (if made to the same measurments) so they can hold a fair bit.

I've used the Reindeer Fun Dies to make a super cute coordinating tag. How cute are these reindeers??!! They are so fun and so festive. 


I've kept the boxes fairly simple as the DSP used is pretty busy. I finished them off with a paper bow that I cut using a template. These boxes are super cute and super fun and perfect for that little Christmas gift.

Why not give these boxes a go? They are perfect to use some of the DSP we've got stored in our craft stashes.

I do hope you like my Fancy 'Not a Card' creations. Check out the rest of  all the different creations that the Stampin' Fancy Friday Design Team has made on the Stampin' Fancy Friday Instagram Account or on the Stampin' Fancy Friday Facebook page. This is where all their creations will be shared throughout the month, so make sure that you are following them to get all of the amazing ideas! You won't be short of inspiration to get those ideas flowing on those 'Not a card' creations.

Thanks so much for stopping by!
Happy Stamping!

Live in Australia?
Shop for Stampin' Up! with Me 24/7 HERE
 
 Recreate this project at home using the following Stampin' Up! products.  Click on the images below to see the product information and to shop from my online store.

Saturday, March 16, 2024

Stampin' Up! On Stage Melbourne 2024 Swaps

 Hello there stamping friends! Welcome, welcome! It's so good to have you here. Today I've got for you my swaps that I've made for the Stampin' Up! On Stage (demonstrator only) event happening this weekend. I'm attening On Stage in Melbourne, Australia but the event is also being held in Houston in the U.S., and Rotterdam in the Netherlands at the same time.

The last time I went to an in person (not Virtual) On Stage event was before the world turned upside down with the arrival of the Covid virus. So would would have been 2019 that was my last in person event. 

To say I'm excited to be going is an understatement! Not only for the event, which will be amazing, but also to catch up with old and new friends, to see new Stampin' Up products, creating with new products, getting a prize patrol or two. Two and a half days of fun with like minded, crafty people. Who wouldn't like that?

 
Swaps can be little 3D gift packaging items or a card that you make multiple of to be 'swapped' with other event attendees. This is a fantastic way to meet people attending the event and to also get inspiration from fellow Stampin' Up! Demonstrators.⁠

I've made some Mini 3" x 3" 'Pizza' Boxes that are little enough to be a swap but  big enough to hold a little treat or two. I've used the Perennial Lavender Suite from the 2024 Jan - April Mini Catalogue to create my Pizza Boxes. I'm really loving anything light purple at the moment so the colours in the DSP from this Suite caught my eye as soon as I saw them in the catalogue! So pretty with all the purples and then the other colours like Pretty Peacock and Crumb Cake. What's not to love really?

Because these are a little bit more intricate than a card swap so I've only made 10 of each design, one with a Basic White Box and the other with a Pretty Peacock Box. With all of the laying and detail it would take me way too long to make any more than that.


Slide the belly band off and the boxes are just plain inside. The boxes are big enough to hold 2 - 3 Cadbury Favourites chocolates but you can fill them with whatever you want. You could even use them as a gift box for jewellery. The best things come in the smallest packages, right?
 

Which Mini Pizza Box is your favourite? I think I'm leaning towards the Pretty Peacock box as my favourite but I do love them both. It's hard to pick a favourite.

To see all the products used check out the supply list below. 

Thanks so much for stopping by!
Happy Stamping!

Live in Australia?
Shop for Stampin' Up! with Me 24/7 HERE
 
 
Recreate this project at home using the following Stampin' Up! products.  Click on the images below to see the product information and to shop from my online store.
 

Friday, December 15, 2023

Just Add Ink #683 | Just Choose Two Challenge

  Hello there stamping friends! I hope that you are having a fantastic week and a fabulous day! It's Friday, Yay, and that means it's time for another Just Add Ink Challenge - Just Add Ink #683 | Just Choose Two Challenge.


Today for our Just Choose Two challenge (to choose two items to feature on your project) we are choosing from Trees, Presents and Ornaments. Great elements to get those cretive ideas to finish those Christmas crating projects. As I've not got many stamp sets with these items I thought a little outside the square and made a Christmas Tree Ornament using Stampin' Up! cardstock. 

I've seen these Honeycomb Ornaments everywhere all over Pinterest in all different shapes and sizes but the tree shape was perfect for our Just Choose Two Challenge today.

They are actually quite easy to make. They just take a little time to put together and to wait for the glue to dry between each step. I made it a little easier on myself by scanning the out line for each cut out piece in my Scan n Cut and cut them out from there. Each tree needs 31 cut out pieces so it would take a while cutting them out by hand. By cutting them out on the Scan N Cut they are all cut out exactly the same and all uniform in size.Work smarter not harder I say. When I can work out how to upload the template on here I will and I'll make a tutorial for how to make them too.

I used Stampin' Up! cardstock to make the tree ornaments. I would say that you wouldn't wan't to use anything any thicker. I would have used Stampin' Up! DSP but I didn't have enough of the one design to cut out all the 31 pieces that I needed for each tree. How pretty would that look though with one pattern on one side and a different pattern on the other.

I used Stampin' Up! Linen thread to make the ornament 'hanger'. I cut 6 strands on the linen thread and plaited/braided them together to make a thicker 'twine' for the tree to hang from.

I hope that I've inspired you for our Just Choose Two challenge. There are lots of AMAZING creations from the rest of the Just Add Ink Design Team on the JAI Blog. Go and check out to see what 'two' elements they all used this week and then while you are there you can see how you can enter your project. Can't wait to see what 'two' you used.

Thanks so much for stopping by!
Happy Stamping!

Live in Australia?
Shop for Stampin' Up! with Me 24/7 HERE
 
 Recreate this project at home using the following Stampin' Up! products.  Click on the images below to see the product information and to shop from my online store. 
 

Monday, November 27, 2023

2024 Stampin' Up!® Jan - April Mini Catalogue | Product Sneak Peek | Perennial Lavender Suite

Hello stamping friends! I'm sharing with you a project I've recently created using the Perennial Lavender Suite products which are coming out in the new 2024 Stampin' Up! Jan - April Mini Catalogue. This is a mega suite in the catalouge with 2 stamp and die bundles, beautiful DSP, Purple Shimmer Gems and Paper Butterfly accents. I can't wait for you to see the catalogue so you can see these products too.


 I needed a gift bag over the weekend and we didn't have the right size so with all the products that I've got in my stash, AKA collection, I'm like "why don't I quickly make one". I just searched a basic gift bag tutorial on Pinterest, and there are lots out there and just used one of those. And because the sheet of DSP that I used had a beautiful design the bag really didn't need to be intricate at all. How gorgeous is the Perennial Lavender DSP by the way? I love that throughout the DSP pack there is minimal white and it is nearly all colour! It's just so stunning. The bag handles are using retired 5/8" Burlap Ribbon still had in my stash.

Every gift bag has to have a matching gift tag right? I used the Perennial Postage Dies to cut the tag and then used the Softly Sophisticated 3D Embossing folder to emboss the tag. This embossing folder is a Sale-a-bration item combined with a stamp set meaning that here in Australia if you spend $180 on product (not including postage and handling) from 4th Jan - 29 Feb 2024 you can get the Softly Sophisticated Stamp Set and Embossing Folder for free.

To finish off the tag I layered some Vellum Basics Specialty DSP, some more of the Perennial Lavender DSP, a piece of Fresh Freesia die cut with the Stylish Shapes Dies, one of the Paper Butterfly Accents from the suite, and some of the gorgeous Purple Fine Shimmer Gems. The Happy Birthday comes from the Retired Cottage Rose stamp set. I just liked the smaller size of it and it layered perfectly with the elements on my tag.

I do hope that you like my little sneaky peek with these new and gorgeous products and I hope that I've given you a little inspiration in using them.

Thanks so much for stopping by!
Happy Stamping! 

Live in Australia?
Shop for Stampin' Up! with Me 24/7 HERE
 
Recreate this project at home using the following Stampin' Up! products. Click on the images below to see the product information and to shop from my online store.
 

Friday, December 16, 2022

Just Add Ink #634 | Just Add Anything But a Card Challenge

 Hello there stamping friends! I hope that you are having a fantastic week and a fabulous day! It's Friday, Yay, and that means it's time for another Just Add Ink Challenge - Just Add Ink #634 | Just Add Anything But a Card Challenge. 

I love this weeks challenge. It has gotten me thinking about making things other than cards and gettting me to rememeber how much I love making 3-D items, which I haven't done much at all this year.

I've gone with some super quick and super easy Origami Boxes. Perfect for that last minute gift that needs some quick and cute gift packaging. These boxes use one sheet of 12" x 12" paper and when they are all folded together you don't need any adhesive to hold them together, but you can if you want to.

I have made these before a few years ago but thought it was great to revisit them. To see how to make them follow this You Tube tutorial. You'll be pleasantly surprised at how easy these boxes are! And you don't have to use a full 12"x12" sheet. You just have to make sure that your starting piece of paper is square. Just bare in mind that the smaller the paper you start with the smaller your box will be. Perfect to customise for any gift.

I've used the Santa Express 12" x 12" DSP for the Boxes and the belly bands and then used some coordinating cardstock to finish off the belly band.

The tags are die cut using the Seasonal Labels Dies and embossed with a retired Stampin' Up! Embossing Folder #useyourstash and the Merry Christmas is cut from the Kindest Gnomes Stamp Set.

All finished off with some retired white ribbon and some linen thread. I think with this bright, fun and busy DSP less is more for a clean and classic look.

Why not give these boxes a go? They are the perfect way to use some of that DSP that you have collected (hoarded) in your crafting stash.

There are lots of fantastic creations from the JAI team this week and they aren't all 3-D items so there will be lots of inspiration for our Anything But a Card Challenge. Go to the JAI blog to be inspired and then while you are there you can see how you can enter your project. Can't wait to see what you create this week.

Thanks so much for stopping by!
Happy Stamping! 


Live in Australia?
Shop for Stampin' Up! with Me 24/7 HERE
 
  Recreate this project at home using the following Stampin' Up! products.  Click on the images below to see the product information and to shop from my online store.