Showing posts with label Gift Packaging. Show all posts

Friday, April 23, 2021

Just Add Ink #551 | Just Add 3D Challenge

Hello there stamping friends. I hope that you are having a fantastic week and a fabulous Friday. Because it's Friday, that means that is time for another Just Add Ink challenge - Just Add Ink #551 | Just Add 3D Challenge.


 This week we are all about the 3D projects. I don't normally make the 3D projects so it was fun this week to do something out of the norm. I started by consulting my favourite place for 3D tutorials, Splitcoast Stampers, and came across a tutorial for a Slider Box. I hadn't made one of these before so I thought it would be fun to give it a go.

When the box is all closed and embellished it looks like a normal gift box....


 But once you pull the ribbon tab on the side to pull out the box a hidden message card pops out to the left at the same time with enough room on it for you to write a simple greeting. Super cute and super fun!

I made the actual box part and the slider mechanisim with Basic White Cardstock and then I've the gorgeous products from the new Pansy Petal Suite that features in the new Stampin' Up! 2021 - 2022 Annual Catalogue, that go live for customers to purchase from on 4th May 2021.


 How gorgeous are the DSP patterns in the new Pansy Petals DSP? And with the gorgeous Pansy Dies to finish off the box you really don't need much else to embellish it as they are a statement on their own.

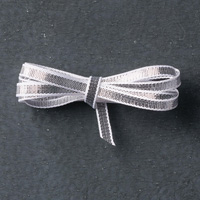
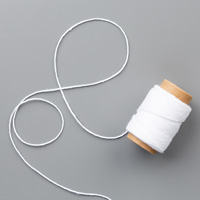
I've finished off the box with a square vellum doily, Linen Thread, White Crinkled Seam Binding Ribbon and the gorgeous 2021 - 2023 In Color Jewels.

I do hope that I've given you some inspiration for this week's 3D theme. Please head on over to the Just Add Ink Blog to see all the variety in the JAI Design Teams Projects and then come and join in the fun of this week's Just Add 3D challenge. Can't wait to see what you create.
 
Thanks so much for stopping by!
Happy Stamping!
Live in Australia?
Shop for Stampin' Up! with Me 24/7 HERE
 
 Recreate this project at home using the following Stampin' Up! products.  Click on the images below to see the product information and to shop from my online store

Put these products on your Wish List to Purchase on May 4th 2021
155810 Pansy Petals Suite $123.00
155674 Pansy Patch Bundle $90.00
155807 Pansy Petals 12" x 12" DSP $20.00
155571 2021 - 2023 In Color Jewels $12.25
155614 Fresh Fresia Cardstock $15.25
155575 Evening Evergreen Cardstock $15.25
155777 Soft Succulent Cardstock $15.25
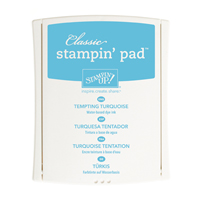
155576 Evening Evergreen Classic Stampin' Pad $13.00
 
Purchase these products today

Monday, August 20, 2018

Stampin' Up!® 2018 Holiday Catalogue Sneak Peek | Joyous Noel Suite

Hello there stamping friends! It' beginning to look a lot Christmas...well it is in the Stampin' Up!® world with the upcoming arrival of the new Holiday Catalogue come September 5th 2018. I'm showing you a sneak peek of products so that you can go ooh and aah and to get your wish list ready to go to place your order once 5th Sept does roll around.

The products that I'm showing you mainly come from the Joyous Noel Suite. It's full of those deep, rich, luxe colours that are so on trend right now with some gorgeous neutrals and a beautiful hint of Copper. It's all just so stunning. So put your feet up, grab a cuppa and lets get on with the creations!

The main focus of all my creations today is that amazing Joyous Noel Specialty DSP. It is out of this world amazing and I've nearly used a whole pack after only having it in my hands for a week. It gorgeous seasonal designs on one side and beautiful copper foil accents on the other. 

Can you tell I love it??!!

I've made 3 cards here today, all keeping with the Sahara Sand neutral as the base and then accented by the Joyous Noel Specialty DSP.

Click on the colour name to see all the Stampin' Up! Products in these colours


 I've also accented the cards with images and sentiments from the Peaceful Noel Stamp Set, the new Sprig Punch, Snowflakes & Stars Wire Elements, Merry Merlot & Copper Reversible Ribbon and the Joyous Noel Glimmer Paper all from the Suite.


 The Festive Farmhouse Elements (the light grey wooden words and seasonal elements) and the Corrugated Dynamic Textured Impressions Embossing Folder that you also see throughout today's creations both come from the Festive Farmhouse Suite in the Stampin' Up!® 2018 Holiday Catalogue but they work so well with the products from this suite too.


How beautiful is that deep, rich Merry Merlot colour? Perfect for all your Christmas Creations. And when teamed up with Tranquil Tide, like in the DSP, you have that gorgeous traditional Christmas Colour Combination.


If you need some quick boxes for the Christmas Season, or anytime of the year really, these gorgeous Petal Boxes are so quick and easy to make. All made from a 5" piece of DSP and 4 x 3" Circles. You could make the base and cut the circles all out DSP or change up the circle 'lid' for a contrasting and fun look like what I've done here.


Stack the boxes together, with a little trinket inside each one, and tie together with the stunning Merry Merlot & Copper 5/8" Reversible Ribbon and you've got a gorgeous little gift all in one. Just makes the gift all the more special to package it up like this.


I've also made a fun Christmas Tree Decoration using the amazing DSP. Can you see why I've nearly used up the whole pack? This is call a Swedish Advent Star and is all made with strips of paper. You make two of the stars and then glue them together to make one big star. 


The front of the Star is embellished with a Rosette again using the Joyous Noel DSP. I cut 2 x 12" strips of the DSP and scored it at every 1/4" and folded it concertina style. I used a hot glue gun and punched out a circle of cardstock to hold the rosette together. The DSP circle on the front also helps to hold the rosette together.


I'm loving the Snowflakes & Stars Wire Elements. They have a copper colour to them and they are perfect for accenting your cards and gifts. Pretty!


The last thing I've got to show you today using products from the Joyous Noel Suite is a fun scrapbook page. I've just die cut squares using the largest of the squares from the Stitched Shapes Framelits. You don't need to pull your sewing machine out for this fun look as the 'faux' stitching from the die does it all for you. Really makes short work to putting a scrapbook page like this together.


I've left a photo off the page for now as I would like to use it with a photo at the end of the year from the 2018 Christmas season. The embellishments aren't stuck down hard and fast so they would be easy to remove when the time comes for me to place my photo in  and then I can put them back and use a stronger adhesive to finish the page off. I've made the blank space big enough to put a 5" x 7" photo in. But you can make it any size that you want or even put in multiple photos.


Because the DSP is quite busy, I really thought that it didn't need much to embellish or accent it. I've just stamped some images from the Peaceful Noel Stamp set and then used some of the other new products from the Joyous Noel Suite to go with it. If you really wanted to you could leave the embellishments off and just have the DSP be the complete hero to the page. It really is that stunning that the DSP on it's own is gorgeous enough.

I hope that I've shown you some products that you now want on your wish list to have ready on 5th September and given you some inspiration on using them too!

Thanks so much for stopping by! 
Live in Australia?
 Shop for Stampin' Up! with me 24/7
Put these products on you wish list. Available to purchase 5th Sept 2018

Avaliable now

Friday, July 6, 2018

Global Design Project 145 | #GDP145 | Colour Challenge

Hi there stamping friends! Thanks for stopping here at my blog. Today I'm playing along with the colour challenge over at the Global Design Project 145 | #GDP145. I'm actually 'killing two birds with one stone' so as to say by entering the GDP challenge by making some tags for some team appreciation gifts.

I love playing along at GDP and I really put this challenge to myself to use this weeks challenge colours as I'm not really an orange or purples person but more of pinks and aquas. So these colours really get me out of my comfort zone.


I only just received this bundle the other day and really wanted to use it straight away! Why let new products sit untouched? I was really drawn to this super pretty bundle with my first look at the 2018 - 2019 Stampin' Up! Annual Catalogue. It just screams my style - pretty, delicate, intricate and all things gorgeous!  

 I die cut the tag out of the stunning marble look DSP from the Petal Promenade DSP. I didn't want a plain Whisper White tag and this soft marble look is perfect with the intricate die cut to not be too busy!


The leaf image I stamped with Sahara Sand ink and then accented the tag with Whisper White Polka Dot Tulle Ribbon, Grapefruit Grove 1/8" Grosgrain Ribbon, Mint Macaron Leaf Die Cut and the 'For You stamped in Grapefruit Grove. I stamped the bird with Fresh Fig Classic Ink on Fresh Fig Cardstock and then poured over Clear Stampin' Emboss Powder for some added interest. I didn't like the way the Clear Embossing Powder bubbled up at first but then looking at it I like the way that it gives the bird some texture. I'm all about layers and texture and this 'mistake' just adds to that look that I love.

To finish off the tag I layered the die cut tag over a piece of Grapefruit Grove DSP from the In Color 6"x6" Paper Stack. I'm a huge sucker for stripes and I love the contrast of the bright striped background with the some marble DSP.

Go an check out how the Global Design Project Design Team used this gorgeous colour combo! There is lots to love there, that's for sure!

Thanks so much for stopping by! 
Live in Australia?
 Shop for Stampin' Up! with me 24/7

 Recreate this tag at home using the following Stampin' Up! products. Click on the images below to see the product information and to shop from my online store.

Thursday, December 14, 2017

Stamp to Share International Design Team Blog Hop | Gift Packaging

Hello stamping friends. Welcome to this months Stamp to Share International Design Team Blog Hop. In amongst this Christmas Season we've got some Gift Packaging ideas for you.

I've got some boxes for you today that are quick and easy to 'whip' up if you still need a quick box for a last minute gift. Its really not long now till Christmas day and if you still need a gift box idea these will help you out of a bind, that's for sure. The longest part of making these boxes will be in the decorating of them and you can make them as minimal or extravagant as you want!

I've gone with one more run of the Merry Little Christmas Designer Series Paper. I've so loved this DSP and I've nearly used up all my stash of it. 😢 Everything about it is amazing! Love, Love Love!!


I made the boxes with the Envelope Punch Board. Just Google Envelope Punch Board Boxes and I'm sure you will be able to find a tutorial on how to make these. They are just too easy!


This first box I've added some Linen Thread, Basic Black Baker's Twine and Silver Metallic Thread and then added a Chalkboard look tag using the Merry Little Labels Stamp set. Super cute and super fun!

To make the Chalkboard look just stamp your image in Whisper White Craft ink, pour over White Stampin' Emboss Powder and heat emboss it. Once the embossing has cooled down and set , wipe over the card stock either with a sponge or a sponge dauber with Whisper White Craft Ink to make it look like 'chalk dust'. Keep going till you have the look you are after.


The next box I've embellished it with the Old Olive 1/4" Stitched-Edge Ribbon and again a tag from the Merry Little Labels Stamp set. Emboss your label on Vellum and layer it on Glimmer Paper for that added sparkle and shine. How gorgeous are those Green Sprigs? A fabulous embellishment for that on trend look.


The last box uses the amazing Buffalo Check pattern. This and the Black and White Version have been my most favourite of all the patterns in this DSP pack. The pattern just pops and is so eye catching! I've embellished this box with some Silver Mini Sequin Trim and some Silver Glimmer Paper die cut with the Large Letter Framelits. Die cutting the first initial of the recipients name is a fabulous alternative to using gift tags.


I do hope that I've given you some more Gift Packaging inspiration and something that will help you to get some gorgeous gift boxes this Christmas.

Now on to my gorgeous friend in New Zealand, Paula Dobson. She has something fabulous to inspire you!

https://stampinantics.blogspot.com/2017/12/gift-packaging-stamp-to-share.html


Thanks so much for stopping by!
 Live in Australia?

 Shop for Stampin' Up! with me 24/7
 Recreate these boxes at home using the following Stampin' Up! products. Click on the images below to see the product information and to shop from my online store.

Saturday, February 25, 2017

Vertical Garden Gift Boxes

This post originally appeared on the Stampin' Up! Corporate Blog on 23rd February, 2017.

Hello, stampers! With succulents being so “hot” right now, I wanted to create something special for you all that had something to do with them. There was just one problem. I don’t as yet have the Oh So Succulent Bundle . Gasp, I know, but I do have the Vertical Garden Project Kit and the Vertical Garden Stamp Set so I’m here today using some of the items out of the Vertical Garden kit and stamp set for some gorgeous gift boxes. I’ve also pulled out a trusty old tool that has a million-and-one uses, the Envelope Punch Board. So I’m mixing up some of the old with the new


The Envelope Punch Board is not only fabulous for making your own envelopes, but you can also make your own boxes with them, too. What’s better than not only making a special handmade card for your special friends but also making the gift box, as well?


I’ve created three different-sized boxes for you with three different looks. I’m loving the mix of the Basic Black Solid Baker’s Twine with the soft Sahara Sand Cardstock to give the gift boxes a bit of a grungy, modern feel.


For the first box I marked and scored all my fold lines and then I measured approximately how wide the swirl stamp image was from the Vertical Garden Stamp Set. I wanted to make sure that I could mark even spacing across the top of the box to stamp and then heat emboss White Stampin’ Emboss Powder. Once the lid was embossed and the embossing powder was set I could put the box and lid together using Tear & Tape Adhesive. Tear & Tape is a strong adhesive and is fabulous for boxes and 3D items. I just wrapped the Basic Black Solid Baker’s Twine a few times and then decorated with the succulents from the Vertical Garden Project Kit

To give the succulents a bit more depth and colour I sponged each petal using the Stamping Sponges. Then I finished off the boxes with 5/8" Burlap Ribbon and Gold Sequin Trim just for some added elements and texture. 

How fabulous is that “Hello” from the Vertical Garden Stamp Set? I love the font and it looks so gorgeous stamped and heat embossed with White Stampin’ Emboss Powder on Vellum Cardstock. I trimmed down the vellum to a 2" strip using the Stampin’ Trimmer, then turned it into a gorgeous tag using the Scalloped Tag Topper Punch. That punch makes tag-making oh, so easy!


The second box is again made with the Envelope Punch Board and embellished in a way that is similar to the first one. I just changed up the stamped images and the size of the box.

The last box is again made with the Envelope Punch Board, but instead of making it in Sahara Sand Cardstock, this one is made using the Thick Whisper White Cardstock. This cardstock is not only fabulous for card bases but for smaller, 3D constructions, as well.

As I did with the first two boxes, I punched and scored the cardstock to prepare for making the box, but before I put it together, I first stamped the swirly image on the lid of the box using VersaMark ink and embossed it using Gold Stampin’ Emboss Powder and the Heat Tool. The splatters over the top are flicks of Gold Wink of Stella. The Wink of Stella adds another touch and element to your creation and really looks fabulous splattered over...well, everything!

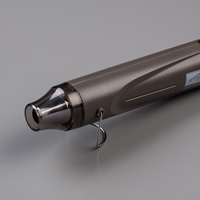
To flick Wink of Stella, give the barrel chamber a bit of a squeeze so the brush tip is quite wet. Then press the brush tip just in the top edge of the lid and push and flick the brush tip out of the lid away from you so that it splatters over your creation. Give the Wink of Stella a minute or two to dry or give it a quick blast with the Heat Tool. (If you don’t let your splatters dry, they will smudge and then not look so pretty.)

The little box is then finished off with some of the same ribbons and trims as the first two boxes as well as some Gold Metallic Thread tied around it for some more added prettiness.
Thank you so much for joining me today. I do hope that I’ve inspired you to dress up your gift boxes and to create a pretty package for your gifts.

Thanks so much for stopping by!

Live in Australia? Shop for Stampin' Up! products with me
Shop for Stampin' Up! 24/7
 Recreate this creation at home using the following Stampin' Up! products. Click on the images below to see product information and to shop from my online store.


(Australian Residents Only)

Tuesday, September 16, 2014

Inspired by 'Frozen'

My daughter and my niece both celebrated their birthday's last week, turning 6 and 7. What do most 6 and 7 year old girls love at the moment? Anything to do with the Disney movie 'Frozen'.
 
I made them both the same card inspired by the character Elsa. I got the idea for the 'Elsa' dress from fellow demonstrator Kelly Kent. Check out her Elsa card here.
 
This is my version!

 
The dress is made with the retired Dress Up framelits. This is a set of framelits that I will never sell, that's for sure!
 
 
To decorate the dress I used the Endless Wishes stamp set from the current Holiday Catalogue. The medium and small snowflakes were a perfect size for on the dress. I stamped the snowflakes with VersaMark, sprinkled over the Iridescent Ice Embossing Powder and then set the embossing powder with the heat tool till it 'melted'.
 
I wanted to keep the same colour theme for my nieces present. Because she lives interstate it's easier to send a gift card which doesn't cost so much to post.
 
 
I dressed up the Gift Card Enclosure with the Soft Sky Seam Binding Ribbon and the Silver 1/8" ribbon. I embossed the medium snowflake from the Endless Wishes stamp set on to the vellum. Its a bit hard to see here but it looks so sparkly IRL.
 
 
I sent a few lollies with the gift card as well and put it all in on of the very cute Polka Dot Tag a Bag Gift Bags
 
Again using the same colours to tie it all together. I do like a bit of matchy matchy.
 
 
Let's hope my niece likes it all!
 
Thanks for Looking!
 
Have Fun and Happy Stampin'


Shop Online
Click on the image below to start your Stampin' Up! shopping with me.