Showing posts with label Male Birthday. Show all posts

Friday, May 17, 2019

Just Add Ink #457 | Sketch Challenge

Hello stamping friends. I've got a fun card to share with you today for the new challenge over at Just Add Ink #457 | Sketch Challenge. I'm sharing some new products from the new Annual Catalogue from Stampin' Up! that customers can purchase from 4th June 2019.
This weeks challenge has been suggested by fellow JAI team member Narelle Farrugia. While the sketch is fairly straight forward it lends itself to a lot of scope that you can do some much with. My card is using products from the Come Sail Away Suite. A fabulous suite perfect for the sailing enthusiast in you life.


I've started my card today with a piece of the Come Sail Away DSP and then overlaid one of the single sided laser-cut cards from the coordinating Come Sail Away Memories & More Card pack. I love the little bits of the card stock pattern coming through the laser-cut card rather than a plain cardstock colour. It really gives so much of a textural effect. I do love a bit of texture on my cards.


The Night of Navy and Balmy Blue colours in the DSP and the stickers from the Memories & More card pack are a fabulous contrast to the neutral colours in the card base.


The Night of Navy/Sahara Sand Baker's Twine is such a fabulous addition to the suite and it really is a gorgeous addition to my card today. I've finished off my card with some of the dies from the Smooth Sailing Dies, some of the stickers from the Memories & More Card Pack and the 'Happy Birthday' comes from the Itty Bitty Birthday's stamp set that fits in perfectly with the layout of the card. I really loved how this card turned out and can't wait to send it out to someone.

We hope you’ll join us and create your own card using the sketch!  We love to see what you make as we browse the gallery each week.  Meanwhile, be sure to stop by the Just Add Ink Blog to see what the design team has created for your inspiration.

Thanks so much for stopping by!
Happy Stamping!
Live in Australia?
 Shop for Stampin' Up! with me 24/7

 Recreate this card at home using the following Stampin' Up! products. Click on the images below to see the product information and to shop from my online store.

Friday, March 15, 2019

Stampin' Up! Artisan Design Team Blog Hop | Classic Garage

Hello there stamping friends! Welcome to another Stampin' Up! Artisan Design Team Blog Hop. This month we are all about the Classic Garage Suite. This suite is to celebrate the men in our lives. It isn't just for Father's Day, it covers a whole range of celebrations. 


This suite has been designed and 'geared' towards the men. When making cards for the guys I usually find that the cards end up looking so plain (well plain to me) because the guys generally don't like pearls and bling and 'pretties' that I love to put on cards. So pulling all that stuff off makes the card look 'naked'.


This suite in the 2019 Occasions Catalogue really has changed all that up. I love that this suite, the stamp set, dies, DSP, ribbon, embellishments, really it has meant that I can go to town with my usual layering style but still keeping the cards looking 'masculine'


On all three cards today all the 'mottled' looking layers all come from the Classic Garage 6" x 6" DSP pack. As I was giving the cards lots of layering and elements I picked sheets from the DSP that wasn't too busy. These three sheets of DSP then made up the colour combination for my cards today.

The first card I use the large gears die and die cut the gears out of vellum. I sponged Versamark Ink around the edge of the Vellum Die Cut and embossed Silver Stampin Emboss Powder. This just added to the metallic look of the card and also added another 'layer' to the card.

The coloured gears are die cut from the DSP. The larger gears die is coordinated with some of the patterns in the DSP. This is Stampin' Up! coordination at it's best! 


My second card I put the Big Shot Embossing mats to work again with the larger gears from the Garage Gears Thinlits. This was embossed onto the Classic Garage DSP and then over that I covered the DSP with a Embossing Powder Splatter.

Squirt out a little bit of Tombow Glue on you Silicone Craft Sheet, squeeze out a little bit of water from your Aqua Painter and mix the glue and the water together. Then using the brush tip of the Aqua Painter splatter the glue mix over your cardstock and then pour over your desired Stampin' Emboss Powder. Here I've used Silver Stampin' Emboss Powder again to go with that metallic look. I've also layered some of the smaller gears thinlits, die cut from Silver Foil Sheets, with some more of the DSP, some of the Black and Silver Striped Metallic Ribbon and the Classic Garage Metal Elements. How fun are those Metal Elements?


My last card is again layering of all the different elements from this fabulous suite, changing them up for a fun a different look. How fabulous do those Basic Black gears look on the Tranquil Tide DSP? Such a great colour combo for the guys! Such a manly look.


I hope that I've given you some more ideas on using this product suite and shown you how you can create the cards for the guys and they don't have to be 'plain'.

Next up on the hop is Stesha Bloodhart over in the U.S. She has some fabulous projects 'geared' up for you. Click on the next blog button to check them out!

https://stampinhoot.com/2019/03artisan-mar-fb/


Thanks so much for stopping by!
Happy stamping!

Live in Australia?

Shop for Stampin' Up! with me 24/7

 Recreate these cards at home using the following Stampin' Up! products. Click on the images below to see the product information and to shop from my online store. 

Monday, May 1, 2017

Stamp Review Crew | Nailed It

Welcome to another Stamp Review Crew Blog Hop using the fabulous Nailed It stamp set.

If you are joining us for the first time we are a group of International Stampin' Up! demonstrators that show one Stampin' Up! stamp set at a time, every first and third Monday's of the month. Be sure to make your way around the hop by clicking the next button at the bottom of each post. If you get lost along the way click on the banner at the top of each post and that will lead you to the list of hoppers so you can continue seeing all the fabulous creations.

http://stampreviewcrew.blogspot.com/2017/05/nailed-it.html

Now, we choose the sets we are going to use for these hops up to 4 months in advance, so May is always a tough month for us. What we plan to use sometimes is retired before we can feature it, like the Build It dies that coordinate with this set. We decided to go forward with this set because the stamps are still available through May 22, 2017 at least (in the US and Canada only). And to provide ideas for those who already own the stamps and the dies. Enjoy!

I've gone with a bit of a feminine feel to my card today. With Mother's Day coming up I've been seeing around some of the stores the pink themed tool sets to make them a bit more pretty for the girls. Every girl needs a set of tools and why not have them pretty looking.

So that is where my card has gone today, a Mother's Day card with pink tools.


I've used the water colour pencils to colour the tools today using the Melon Mambo and basic Grey Pencils. I find when using the pencils that I like to pick up a bit of colour straight off the pencil using an aqua painter rather than colouring the image with the pencils. Picking the colour straight off the lead works better for me but if you like to put the colour down first by colouring straight on the cardstock then that's fine too. We do what works for us.


 I thought I would team the pink tools up with the Pop of Pink DSP that is also on the Retiring Products list. This has been my all time favourite DSP for 2016/2017 and I am really going to miss this one.I thought I would give it one last 'hurrah' before it is gone for good.

 If you are quick here in Australia you can still get it but it is on the Low Inventory List. Order it today so you don't miss out!


I've teamed up with the pink tools the Silver Foil Stitched Shapes circle embossed with the Hexagons Dynamic Textured Impressions Embossing folder that gives the embossing a 3-D look. Such a fabulous embossing folder and, yay, that one is staying in the 2017/2018 Stampin' Up! Annual Catalogue. OH Yeah! 

I hope that I've given you another idea to use with the Nailed Stamp set. Here in Australia if you want the Nailed It stamp set you had better be quick because you can only get it now in Wood Mount and there are only a few sets left.

Now on to fellow Aussie, Bronwyn Eastley with her amazing creations. I'm sure you won't be disappointed with all her ideas.

http://addinktivedesigns.com/2017/05/01/the-stamp-review-crew-nailed-it/

http://juanacreate.blogspot.com/2017/05/stamp-review-crew-nailed-it-bundle.html

To see some more ideas using the Nailed it Stamp Set, click on the pictures below

http://rochelleblok.blogspot.com.au/2016/11/on-stage-display-cards-part-1-nailed-it.html


http://rochelleblok.blogspot.com.au/2016/12/on-stage-display-cards-part-2-nailed-it.html

http://rochelleblok.blogspot.com.au/2016/12/on-stage-display-cards-part-3-nailed-it.html


Thanks so much for stopping by!
Live in Australia?
Shop for Stampin' Up! products with me 24/7

Recreate this creation at home using the following products. Click on the images below to see the product information and to shop from my online store.

(Australian Residents Only)

Because some of the items are on the Retiring Products List they may not be avaliable anymore.
Build it Framelit Dies - No Longer Avaliable in Aust.

Friday, October 21, 2016

Just Add Ink #334 - Just Add Inspiration

Happy Friday to you and thank you for stopping by! Today there is a new challenge over at Just Add Ink. Its an Inspiration Pic chosen by fellow JAI team memeber, Di Barnes.


It says to me rustic, wooden elements and masculine. So I've tried to incorporate some of those elements for a Masculine birthday card also trying to use some of the colours from the pic too.

Click to see all Stampin' Up!'s products in that colour


The wooden herringbone DSP is from the Serene Scenery DSP paper stack which has stunning photographic artwork for a life like looking DSP.  There are 4 each of 12 double-sided designs in 6"x6", so I'm sure there is something in the DSP stack that will tickle your fancy.


I've then used the colours Dapper Denim and Watermelon Wonder for the rest of the design elements of the card. I think it is a masculine looking card, even with a bit of ribbon and sewing on it, what do you think?

 I hope that you join us this week at Just Add Ink! We love to see everyone of your creations each week and your take on the challenge!

 Thanks so much for stopping by!

Shop for Stampin' Up! 24/7
 Recreate this card at home using the following Stampin' Up! products. Click on the images below to see product information and to shop from my online store. (Australian Residents Only)

Wednesday, May 11, 2016

Happy Birthday to my big teenager!!

EEEKK! Today my biggest boy, Asher, turned 13 today!! I can't believe that I now have a teenager.  He was acutally born on Mother's Day and was my very first, most wonderful Mother's Day present, after 10 hrs of labour and being 2 weeks overdue. He weighed in at a whopping 9lb 15oz and as most mothers say the cliche saying, I will say it too, it only feels like yesterday he was born and I can remember very clearly the details of his birth, except the part my husband is adamant I said yet I have no recollection of, that I was 'Never doing that again'. Ha! Two more children after Ash. I don't think I  'Never did that again'.

I can't believe how much Asher has grown up in his 13 years. He is about a head shorter that my husband and myself (my husband and I are nearly the same height and I'm nearly 6ft) and as I've always said, I think it wont be long before he is taller than both of us. He is a beautiful natured boy, loving, caring, generous, kind, sharing, very willing to help at all times, fun loving, and he has a huge servant heart! I love now that he is getting older that we can converse on a more adult level and that he is growing into a young man.


For Asher's birthday, of course I made him a birthday card. I had a play around with some of the new 2016 - 2018 In Colours, Emerald Envy and Dapper Denim. These two colours a bold and rich and perfect for those male cards.


I stamped the Gorgeous Grunge splatter image with Basic Black Archivial ink on Kraft cardstock and then die cut stars out of Dapper Denim cardstock. What a gorgeous blue!! It's such a rich colour and so bold! It is stunning! Emerald Envy is just as beautiful! I can see these new colours getting a lot of use.


I've used Emerald Envy to stamp the Happy Birthday from 'Silhouette and Script', the hostess set. I lobe the look of the sentiment and the modern look to it . It goes perfectly with the Gorgeous Grunge. Its all finished off with some numbers die cut from the Large Numbers set, Gold Metallic thread and some Gold sequins from the Metallics Sequins Assortment. The two gold glimmer stars a helping hide the glue dots as I didn't want them to be visible through the vellum numbers. I think it looks better when you can't see the adhesives through the vellum. Makes for a much cleaner look.

I hope that I've inspired you a little today with some of the new upcoming In Colours. Now off to play with the rest of the other In Colours to see what I can come up with.

Thanks so much for stopping by!

Tuesday, September 9, 2014

Another '40th'

Here is the last of the male cards I had to make over the last couple of weeks. This one was a very special one for my wonderful husband who turned the BIG 4 - 0 over the weekend!
 
 
I again used the Back to Black DSP but this time teamed it with not only Crumb Cake Cardstock but Real Read as well. I really love the Back to Black DSP and it goes very well on male cards!
 
 
The gold accents have come out again! Still loving the gold! I again used the retired Bigz Alphabet Typeset Numbers but you could easily use the new Perfect Print Numbers Bigz from the 2014 Annual Catalogue.
 
Click on any products that I used below and you can purchase them straight from my online store.
 Thanks for looking!
Happy Stampin'


Thursday, September 4, 2014

'Dream' Card

Do you ever have those times when card ideas pop into your head just as your drifting off to sleep? What do you do? Do you get up scribble something down and go back to bed? Do you get up and start creating said card? Or do you drift off to blissful sleep and hope that it comes back to you the next day?
 
This card came to me as I was drifting off to sleep. Yes weird I know! And I drifted off to sleep hoping it would come back to me in the morning! And it did! I was very happy with the way it turned out!

 
I've been reading the Stampin' Up! Artisan Blog Hops each week and Krista Frattin from Stampin' Dolce (Check out her blog here) showed/reminded me about cutting off the side of the ribbon and pulling the threads out for an embellishment on your creations. I cut the new 1/8" Gold ribbon and pulled the gold thread out of the metallic bakers twine.
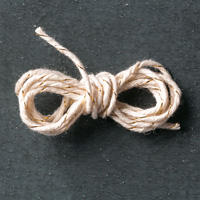
 
 
Everything has to have a touch of gold on it these days! I just love how it pops off the page and almost looks regal. Gives the creations a very classy look! I have used the retired Bigz Alphabet Typeset Numbers but you could easily use the new Perfect Print Numbers Bigz from the 2014 Annual Catalogue if you really wanted to use current prodcts.
 
Thanks for Looking
Have fun and Happy Stampin'


All products Stampin' Up! unless otherwise stated.
Stamp Set - Dotty Angles
Card Stock - Crumb Cake, Whisper White, Basic Black, Vellum, Gold Foil Sheet
DSP - Back to Black
Ink -Versa mark
Other - Big Shot Die Cutting Machine, Bigz Alphabet Typeset (Retired), Gold Embossing Powder, Heat Tool, Burlap Ribbon, 1/8" Gold Ribbon, Gold Metallic Bakers Twine